In the world of hair transformations, clip-in hair extensions have emerged as a popular choice, granting individuals the power to instantly achieve longer, fuller, and more voluminous hair without the commitment of permanent extensions. While there are countless options available in stores, crafting your own clip-in hair extensions allows for personalization and customization to suit your unique style. In this comprehensive guide, we will walk you through how to make clip-in hair extensions, ensuring you achieve salon-quality results from the comfort of your home.
Materials You’ll Need
Get the following materials before starting the creative process:
- High-quality hair wefts (real or synthetic, based on your preference and budget)
- Clips (available at craft or beauty supply stores)
- Needle and thread (choose a color that matches the hair wefts)
- Scissors
- Measuring tape
- Hair glue or adhesive (optional, for added security)
How to Make Clip-in Hair Extensions Step 1: Choose the Right Hair
The foundation of exceptional clip-in hair extensions lies in selecting the right type of hair. Real human hair offers a natural look and can be styled and treated just like your own locks. On the other hand, high-quality synthetic hair can be a more budget-friendly option, often pre-styled and requiring minimal maintenance. Regardless of your choice, ensure that the hair’s texture, color, and length closely match your natural hair for a seamless and flawless blend.
Step 2: Measure and Cut
With your hair wefts ready, the next step is to measure and cut them to the desired length. Using a measuring tape, start from the nape of your neck and determine the length you want the extensions to reach. Carefully trim the hair wefts using sharp scissors, creating a neat and even edge.
How to Make Clip-in Hair Extensions Step 3: Prepare the Clips
Lay the clips on a flat surface and prepare them for attachment to the hair wefts. These clips will serve as the anchor points that securely fasten the extensions to your natural hair. Depending on the width of your hair wefts, you might need to cut the clips to fit perfectly.
Step 4: Sew the Clips
One by one, take the hair wefts and position a clip along the top edge of each weft. Make sure the clip is centered, and the teeth are facing inwards. Using a needle and thread, securely sew the clip onto the weft. Employ double or triple stitching for added durability, ensuring the clip stays in place even with frequent use.
How to Make Clip-in Hair Extensions Step 5: Repeat for Multiple Wefts
Achieving a full and balanced look requires creating multiple wefts of varying widths. Wider wefts are ideal for the back of your head, while narrower ones work best for the sides and front. By making a variety of wefts, the extensions will blend more naturally with your natural hair.
Step 6: Test the Extensions
Before applying the extensions, it’s essential to test them to ensure they are secure and well-made. Clip each extension onto your natural hair and gently tug to check if they hold firmly in place. This step allows you to detect any issues with the clips or stitching and make any necessary adjustments before the final application.
How to Make Clip-in Hair Extensions Step 7: Wash and Style
With your clip-in hair extensions complete, you may want to wash real human hair extensions to ensure they are clean and fresh. Synthetic hair, however, does not require washing but can be styled using mousse or hair sprays to hold curls or add volume. If you’re using real hair, you can treat the extensions just like your natural locks, using heat styling tools or curling irons.
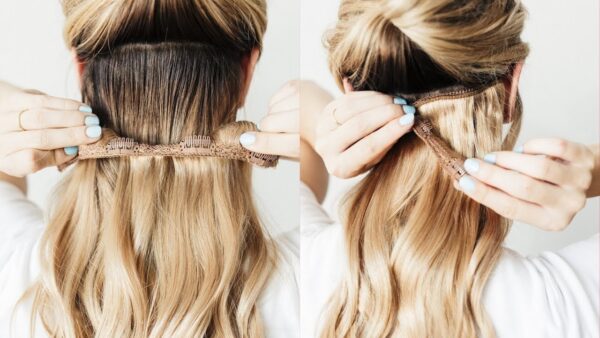
Step 8: Applying Clip-In Hair Extensions
Applying clip-in hair extensions is a straightforward process that requires no professional assistance. Follow these simple steps to apply the extensions:
- Begin by parting your hair horizontally, creating a section where you want to add the extensions.
- Slightly tease the roots of this section to create a better grip for the clips.
- Open the clips on the wefts and position them along the part, pressing the clips firmly to snap shut.
- To get the desired look, repeat this procedure for each part.
Step 9: Blending and Styling
Once the clip-in hair extensions are in place, use a comb to blend them seamlessly with your natural hair. Be gentle during this step to avoid pulling on the extensions and causing damage. Now that your extensions are seamlessly integrated, you’re free to style your hair as desired. Whether you leave it straight, curl it, or create an elegant updo, the extensions will enhance your overall look.
Conclusion
Creating your own clip-in hair extensions is a gratifying DIY project that allows you to experiment with various styles and looks. By following this step-by-step guide, you can customize your extensions to match your hair type, texture, and color perfectly. Clip-in hair extensions offer versatility, convenience, and the ability to change up your hairstyle whenever you desire. Embrace your creativity, and let your hair be a canvas for your unique style expression, elevating your confidence and beauty to new heights. So go ahead and embark on this exciting journey of creating your own clip-in hair extensions to embrace the magic of endless hair possibilities.